Staff Guide
This guide is for makerspace managers with the Staff role. You have full access to the Equipment Status Board, including equipment management, user administration, and system configuration. This guide focuses on the capabilities unique to staff — for repair record management, see the Technicians Guide, which also applies to you.
Getting Started
Logging In
Navigate to the Equipment Status Board URL and log in with your username and password. After logging in, you land on the Kanban Board — your primary tool for monitoring repair activity.
Navigation
The navigation bar gives you access to all areas of the system:
| Link | What It Shows |
|---|---|
| Kanban | Kanban board overview of all open repairs |
| Repair Queue | Sortable/filterable repair table (same view as Technicians) |
| Equipment | Equipment registry — browse, add, edit equipment |
| Users | User management — add, edit, manage accounts |
| Status | Status dashboard — color-coded equipment grid |
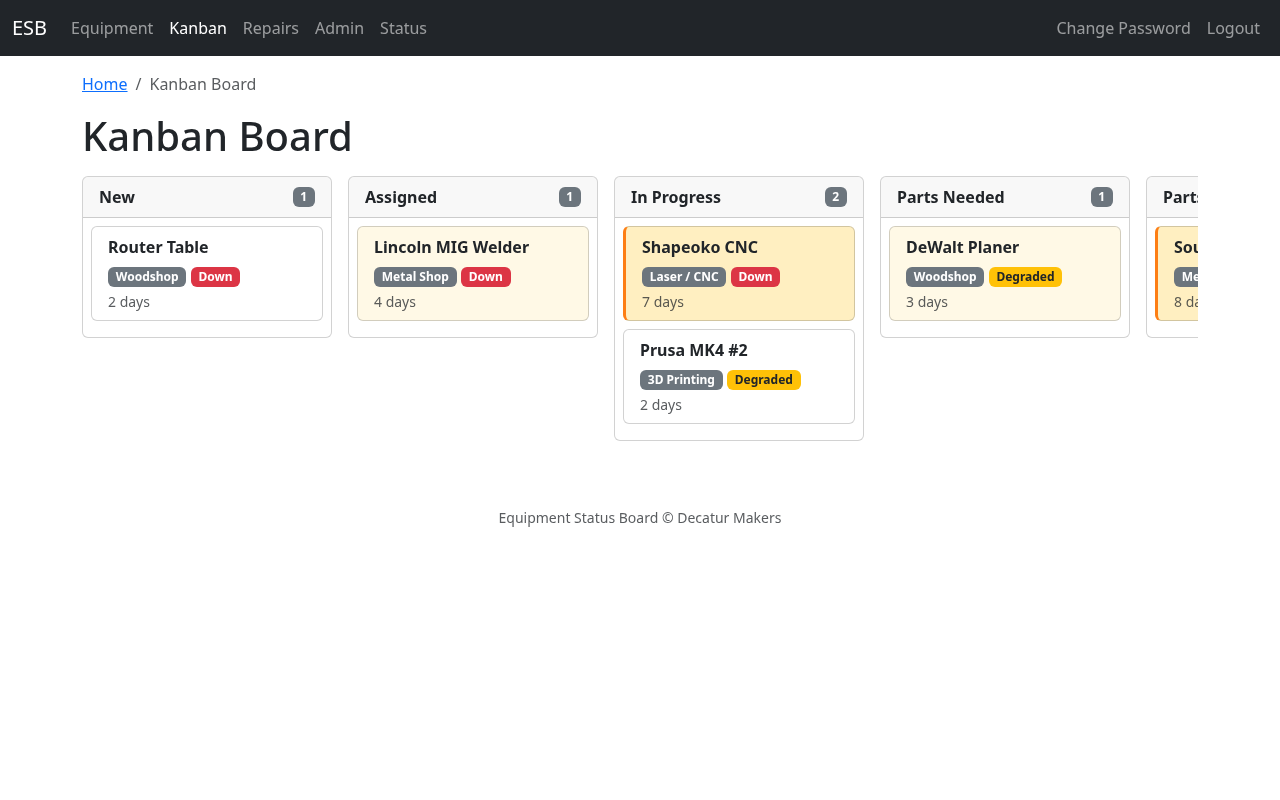
Using the Kanban Board
The Kanban board gives you an at-a-glance view of all active repairs organized by status. It's designed to answer one question immediately: what's stuck?
Reading the Board
Each column represents a repair status:
- New — Reported but not yet assessed
- Assigned — Someone has taken responsibility
- In Progress — Actively being worked on
- Parts Needed — Waiting for parts to be identified or ordered
- Parts Ordered — Parts ordered, waiting for delivery
- Parts Received — Parts in hand, ready to install
- Needs Specialist — Requires expertise beyond current technicians
Resolved and Closed repairs are not shown on the Kanban board — only active repairs appear.
Card Information
Each card on the board shows:
- Equipment name
- Area (e.g., Woodshop)
- Severity indicator (color-coded)
- Time in current column
Cards within each column are ordered by time-in-column, with the oldest at the top.
Aging Indicators
The Kanban board uses visual aging indicators so you can spot stuck items without reading details:
| Age in Column | Visual Treatment |
|---|---|
| 0-2 days | Default styling — normal |
| 3-5 days | Warm tint — starting to age |
| 6+ days | Strong indicator — needs attention |
If a card has a strong aging indicator, it has been sitting in that status for too long and likely needs intervention — a follow-up with the assigned technician, a parts order, or escalation.
Taking Action
The Kanban board is a read-only overview. To take action on a repair, click a card to open the full repair record, then make changes there (update status, add notes, reassign, etc.).
Desktop vs. Mobile
On desktop, columns are displayed side by side with horizontal scrolling if needed. On mobile, columns are stacked vertically as collapsible sections.
Managing Equipment
Viewing the Registry
Click Equipment in the navigation bar to see all equipment in the system. Use the area filter to narrow the list.
Creating Equipment
- Click the Add Equipment button
- Fill in:
- Name (required) — e.g., "SawStop #1"
- Manufacturer — e.g., "SawStop"
- Model — e.g., "PCS175"
- Area (required) — select the area where the equipment is located
- Click Save
Editing Equipment
- Click on a piece of equipment to open its detail page
- Click the Edit button
- Update any fields as needed
- Click Save
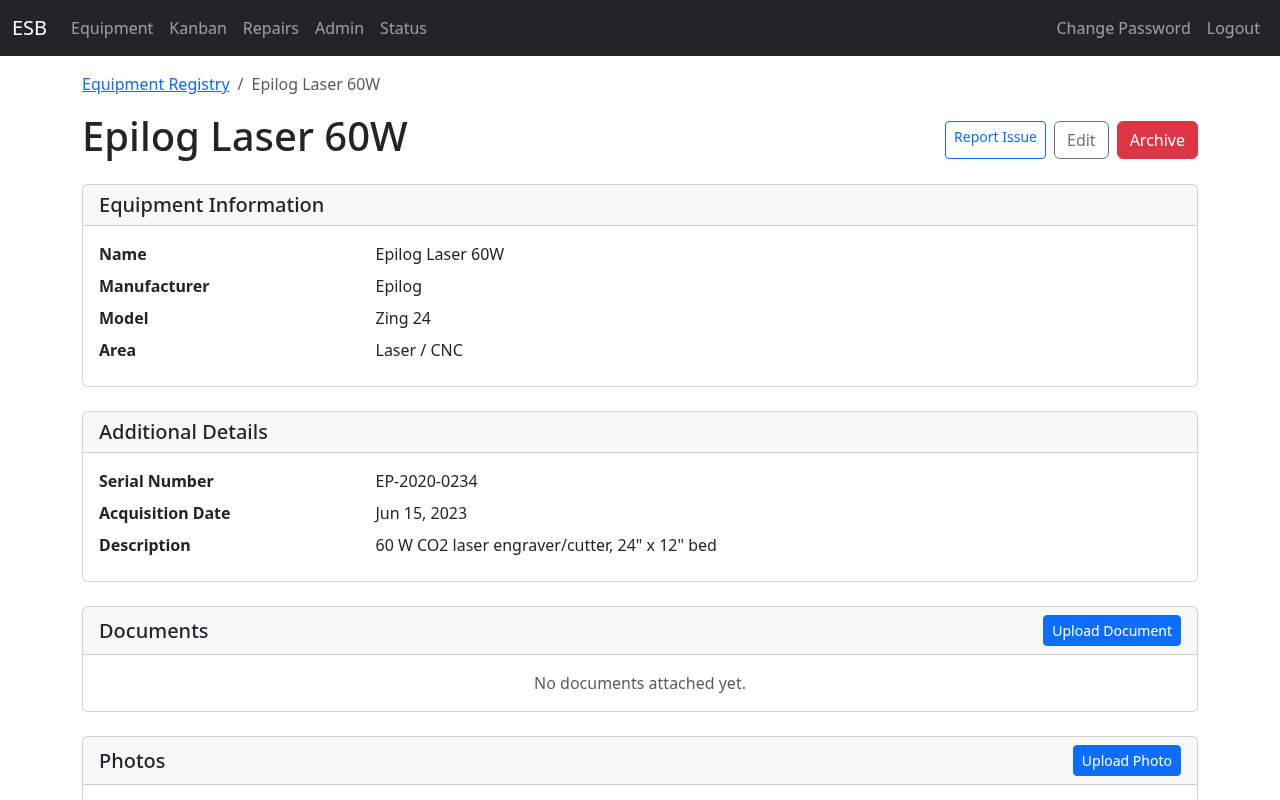
Adding Documentation
From the equipment detail page, you can upload and manage reference materials:
- Documents — Upload manuals, guides, and reference PDFs with category labels:
- Owner's Manual
- Service Manual
- Quick Start Guide
- Training Video
- Safety Data Sheet
- Other
- Photos — Upload equipment photos for identification
- Links — Add external URLs for product pages, support sites, training videos, and other online resources
Repair History
The equipment detail page includes a Repair History table listing every repair record that has ever been filed against that piece of equipment — both open and resolved, newest first. Each row shows when the issue was opened, its severity, current status, assignee, and a short description. Click any row to jump to the full repair record, including timeline notes and photos.
Closed records — whether "Resolved", "Closed - No Issue Found", or "Closed - Duplicate" — remain in the history permanently so you can trace the repair history of a machine over its lifetime.
Archiving Equipment
When a piece of equipment is retired or removed from the space, archive it instead of deleting it. Archiving is a soft delete that preserves all history (repair records, documents, photos) while removing the equipment from active views.
Exporting the Inventory to CSV
From the equipment registry page, click the Export CSV button (next to Add Equipment) to download a spreadsheet of the equipment inventory. The file (equipment_inventory.csv) opens directly in Excel, Google Sheets, LibreOffice Calc, or any other spreadsheet tool.
The export includes one row per equipment item with these columns: id, name, manufacturer, model, serial_number, area, acquisition_date, acquisition_source, acquisition_cost, warranty_expiration, description, is_archived, created_at, and updated_at.
- If you have an area filter applied on the registry page, the export is scoped to just that area. Clear the filter first if you want the full inventory.
- Archived equipment is excluded by default. To include archived items, append
?include_archived=1to the export URL (or combine with an area filter, e.g./equipment/export.csv?area_id=3&include_archived=1).
QR Code Labels
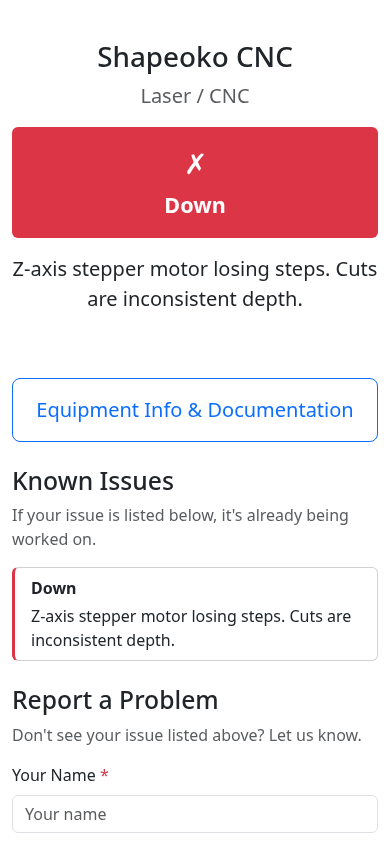
Each piece of equipment can have a printable QR code label attached to it. When a member scans the label with their phone, they land on the public equipment page, where they can see current status and report problems without needing to log in.
Who can generate QR codes
Any logged-in user (Staff or Technician) can generate QR codes from the equipment detail page. The feature is only available when an administrator has set the ESB_BASE_URL environment variable — see the Administrators Guide for details. If the button is disabled with the tooltip "ESB_BASE_URL not configured", contact an administrator.
Generating a QR code label
- Open the equipment detail page for the item you want to label.
- Click Generate QR Code.
- Pick a size from the dropdown. Choices include square stickers (1", 1.5", 2", 3", 4"), Avery label sizes (5160 and 5163), and a US Letter full-page option.
- Optionally enable Include equipment name above QR to print the equipment's name at the top of the label.
- Optionally enable Include URL below QR to print the scan target URL at the bottom of the label.
- Watch the live preview update as you change options.
- Click Download QR Code to download a PNG file ready to print.
All output is rendered at 300 DPI so labels print sharply at any of the listed sizes.
Tip: URL text below the QR is most useful at label/page sizes (Avery 5163, US Letter). On small stickers (≤ 2") the URL is usually truncated and adds little value — the live preview shows the result; uncheck Include URL below QR if it isn't legible.
When someone scans a printed QR label, they see the public equipment status page — see the example below for the member-side view.
Managing Areas
Navigate to Admin > Areas to manage the areas (rooms/zones) of the makerspace.
Creating Areas
- Click Add Area
- Enter the area name (e.g., "Woodshop")
- Set the Slack channel for repair notifications for this area (e.g.,
#woodshop-repairs) - Click Save
Editing Areas
Click an area to change its name or Slack channel mapping.
Archiving Areas
Archive an area to remove it from active views. Existing equipment retains its area association for historical reference.
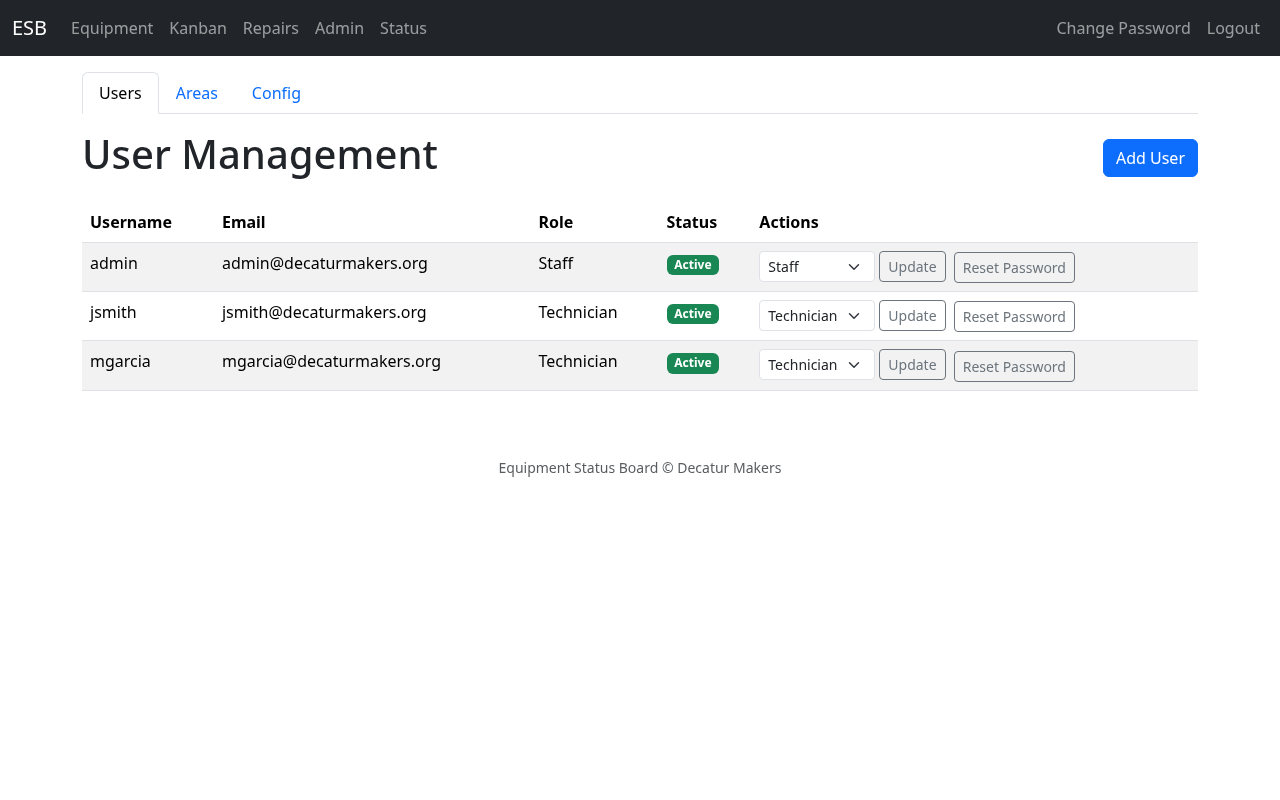
Managing Users
Navigate to Admin > Users to manage technician and staff accounts.
User List
The user list shows:
- Username
- Role (Technician or Staff)
- Status (Active or Inactive)
Creating Users
- Click Add User
- Fill in:
- Username (required)
- Email (required)
- Slack handle — For Slack DM notifications
- Role — Technician or Staff
- Click Save
The system generates a temporary password. If the user has a Slack handle configured and the Slack integration is active, the temporary password is sent via Slack DM. Otherwise, it is displayed on screen one time — copy it and deliver it to the user securely.
Changing Roles
Change a user between Technician and Staff roles directly from the user list.
Resetting Passwords
Generate a new temporary password for a user. The password is delivered via the same mechanism as initial creation (Slack DM if available, otherwise displayed on screen).
Configuring the System
Navigate to Admin > Config to adjust system-wide settings.
Technician Documentation Editing
Toggle whether Technicians can edit equipment documentation (upload documents, photos, and add links). When disabled, only Staff can manage equipment documentation.
Notification Triggers
Enable or disable which events trigger Slack notifications:
| Setting | When It Fires |
|---|---|
| New Report | A member reports a problem via QR page or Slack |
| Resolved | A repair is marked as Resolved |
| Severity Changed | The severity level of a repair changes |
| ETA Updated | An ETA is set or changed on a repair |
Notifications are sent to the area's configured Slack channel and to the #oops channel (configurable via the SLACK_OOPS_CHANNEL environment variable).

Working with Repairs
Staff have full access to the Repair Queue (accessible via the Repair Queue link in the navigation bar). All repair record management capabilities described in the Technicians Guide apply to you as well — viewing the queue, managing records, adding notes, changing status, assigning, and using Slack commands.
Understanding Status
Status Dashboard
Click Status in the navigation bar to see the color-coded equipment grid organized by area. This is the same view that members see — useful for quickly checking the overall health of the space.
Static Status Page
The static status page is an externally hosted lightweight version of the status dashboard. It is automatically regenerated and pushed whenever equipment status changes. This allows members to check status from outside the makerspace network. Configuration of the static page push method is handled by an administrator via environment variables.